This guide will cover how to set up a basic frontend project with Typescript. It expects you have Yarn package manager installed or you know how to translate basic commands to npm.
I am working on a game engine guide and decided that a primer might be in order. This is by no means exaustive but may be helpful for people who are new to Typescript and want to see their code do stuff in the browser fast.
Completed source:
https://github.com/donanroherty/tutorial-typescript-boilerplate-for-frontend
Overview
I will keep the stack as simple as possible. The only external libraries I use will be Typescript and a local webserver. This article will cover:
- Initializing a Typescript project
- Using a dev server to run code in the browser
- Debugging with Visual Studio Code and Chrome
Initializing a Typescript project
Open a terminal and navigate to your project’s folder of choice. Execute the following commands to create our project’s folder structure and open it in Visual Studio Code.
mkdir typescript-app
cd typescript-app
mkdir src       # directory to hold our source code
mkdir public    # director to hold our release code
code .          # open the folder in VSCode
Initialize a new project using Yarn to generate a package.json file, accepting the defaults for all options. Then add Typescript to the project as a developer dependency. Finally, use Typescript’s tsc --init command to generate a default tsconfig.json which we can use to configure our project.
yarn init               # accept default options
yarn add -D typescript  # add Typescript as a developer dependency
yarn tsc --init         # create a default tsconfig.json in the project directory
Our directory structure should now look like this:
- /typescript-app
  - /node_modules
  - /public
  - /src
    package.json
    tsconfig.json
    yarn.lock
Configuration
Typescript configuration can look scary at first but we only need to make a few changes.
In tsconfig.json, Set the following properties to tell TS to target ES6 JavaScript and set the source root and output directories.
// tsconfig.json
{
  "compilerOptions": {
    // ...
    "target": "es6",
    "module": "ES6",
    "outDir": "./public/js",
    "rootDir": "./src"
    // ...
  }
}
Our first Typescript file
Inside the src folder, add a file named app.ts and give it the following contents.
// src/app.ts
function greet(name: string) {
  const greeting = document.createElement("h1")
  greeting.textContent = `Hello ${name}`
  document.body.appendChild(greeting)
}
greet("Typescript")
Open package.json and add a scripts object property, containing a key named ts followed by a command to start Typescript in watch mode.
// package.json
"scripts": {
  "ts": "tsc -w"
 },
In a terminal, run our new script:
yarn tsTypescript will now build our .ts files into .js files which the browser can execute. You will find the resulting JavaScript in ./public/js/app.js.
Running code in the browser
We now have Typescript building and outputting JavaScript. The next step is to get that JavaScript running in a browser. To do this, we need an HTML file and a local development server.
Creating the HTML content
Create a file named index.html in the public folder and add the following content:
<!DOCTYPE html>
<html>
  <head>
    <meta charset="utf-8" />
    <meta http-equiv="X-UA-Compatible" content="IE=edge" />
    <title>Typescript boilerplate</title>
    <meta name="viewport" content="width=device-width, initial-scale=1" />
  </head>
  <body>
    <!-- Load our app.js script -->
    <!-- Setting type="module" enables modular JS in browser -->
    <script src="/js/app.js" type="module" async defer></script>
  </body>
</html>
Serving content to the browser
There are lots of options out there for dev servers. I chose dev-server by Modern Web as a super-simple option to get started fast.
yarn add -D @web/dev-serverTo launch the server we need to add a new command to the scripts object in package.json. Our new "serve" command will switch to the public folder and launch as a server in watch mode targeting index.html.
// package.json
  "scripts": {
    "ts": "tsc -w",
    "serve": "cd public && web-dev-server --node-resolve --watch --open --app-index index.html"
  },
Open a new terminal window in VSCode and run yarn serve. The dev server will startup and serve the index.html file over localhost:8000. If you change any code in src/app.ts, Typescript will rebuild the code; the server’s watch mode will notice the changes in public/js and refresh to show your changes.
yarn serveWeb Dev Server started...
Root dir: /Users/ronan/Dev/apps/game-engine-tutorial/public
Local: http://localhost:8000/
Network: http://192.168.0.10:8000/As one last quality of life improvement, add a final dev command which will run both the dev server and Typescript in a single command. Be aware however that output from the dev server may sometimes obscure Typescript errors and vice-versa.
// package.json
"scripts": {
  // ...
  "dev": "yarn ts & yarn serve"
},
yarn dev # run both Typescript and dev-server in a single commandNavigate to http://localhost:8000/ in your browser and you should see the output of our greet function from app.ts.

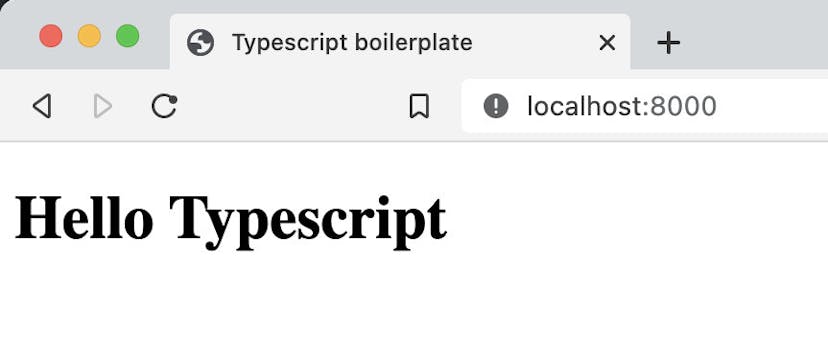
Our final directory structure should look something like this:
- /typescript-app
  - /node_modules
  - /public
    -/js/app.js
    index.html
  - /src
    app.ts
    package.json
    tsconfig.json
    yarn.lock
Bonus: Setup debugging in VSCode
Debugging allows you to pause your application at runtime and step through it line by line. If you've been relying on console.log() to check values at runtime, this is gonna be a big help.
Open tsconfig.json. Add the following two properties to enable sourcemaps and direct them to the /src folder.
{
  "compilerOptions": {
    // ...
    "sourceRoot": "../src",
    "inlineSourceMap": true
    //...
  }
}
Now we'll generate a launch.json file to tell VSCode to how launch a new instance of Chrome and attach to it.
In VSCode:
- Press
F1 - Select
Debug: Select and Start Debugging->Add Configuration...->Chrome - Open
.vscode/launch.json. Set"url"to"http://localhost:8000"
// .vscode/launch.json
{
"version": "0.2.0",
"configurations": [
{
"type": "pwa-chrome",
"request": "launch",
"name": "Launch Chrome against localhost",
"url": "http://localhost:8000", // ensure this points at port 8000
"webRoot": "${workspaceFolder}"
}
]
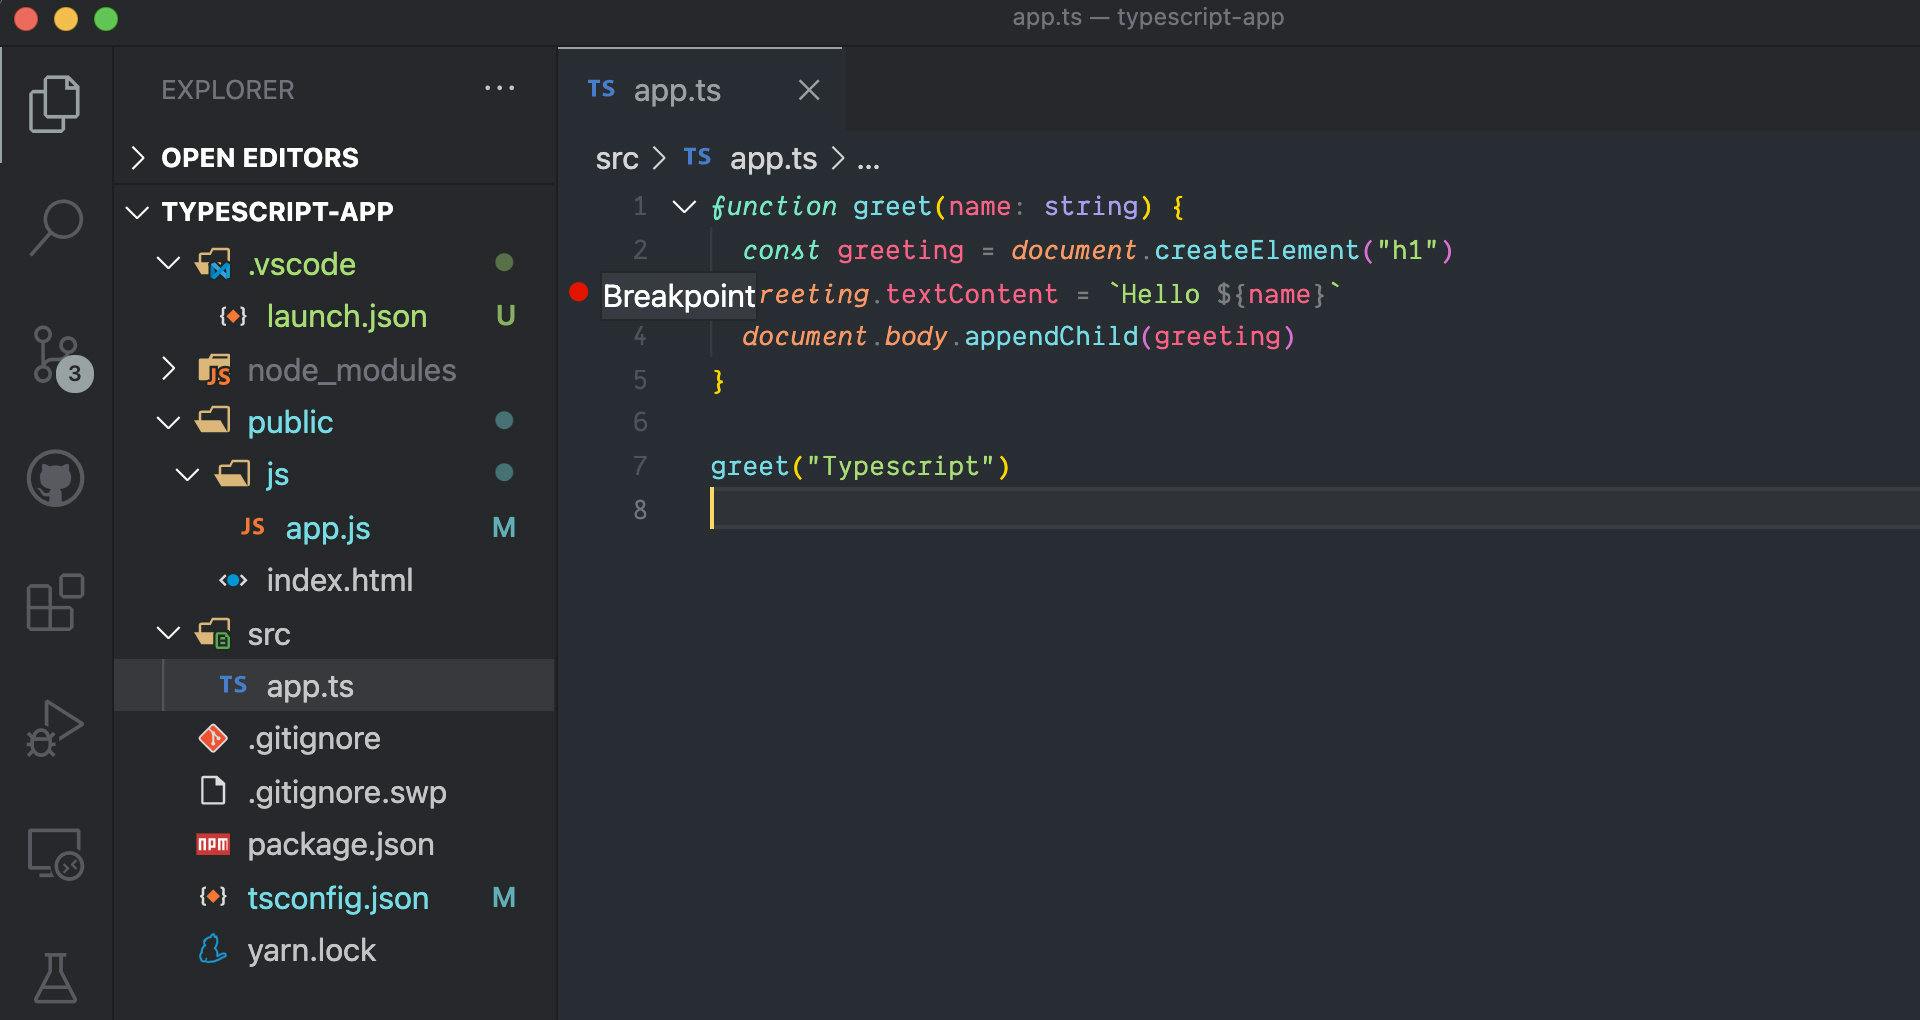
}Finally, add a breakpoint next to a line of code in app.ts and hit F5.
A new Chrome instance will open and load our project. As soon as the line with a breakpoint is executed the debugger will freeze execution and the current state of our app will be navigable in VSCode. Step to the next line with F10 or continue execution with F5.
Conclusion
That’s it! We created a Typescript application to use as a boilerplate for any frontend application. I will using be this as a launching point for an upcoming game engine tutorial so stay tuned.
This is my first blog post. I hope this was useful to someone.